Showing posts with label DIY Project. Show all posts

Twinkle... Twinkle... little Baby Star...

                                                                          ★     ★    
                   How I wonder what you are...
                               Up above the world so high...
Like a diamond in the....

"Starry Baby Ceiling Sky"


Don't you just love this...                
    Not only is this decor idea as easy as pie... it is also super cheap
    Well and most of us like things that are easy to do...
    and that won't rip a huge hole into our Budget...

                   Also...
                          once your little one grows out of it
                             or once they no longer want to be cute & cutely
                                this special "Starry Sky" can be easily removed
                          

First things first...
                                            Pick a pretty paint color for the ceiling...


I personally recommend a light color (i.e White or light Blue/Pink)
Also... make sure you let the paint dry all the way 

Next...
    Measure the ceiling and figure out how many stars you will need...


 Measure distance between the stars...


Now...
   With the easy to erase pencil mark a "grid" on the ceiling...


...it will be your guide for where you later glue the stars


For the stars you want to choose a adhesive foil in either Gold or Silver...
         those two colors will shimmer beautifully in the evening

 
Next...
    Take your "Star Stencil" and mark the stars on the adhesive foil...
         then take a small precision knife or scissor and cut out each individual star


 ...take the stars and place them where your grid lines intersect

  Once you are finished placing all the stars onto the ceiling...


take a soft damp cloth and clean the grid lines off the ceiling

Now look at this...
           isn't this idea just absolutely BEAUTIFUL


For this fun DIY project you will need...
  • Paint for the Ceiling (light color)
  • One Star Stencil (about 5")
  • Marker
  • Adhesive Foil - Silver or Gold
  • Pencils (easy errase - that way your guides can easily be wiped off)
  • Scissors or Precision Knife

Let the Sun' shine already...

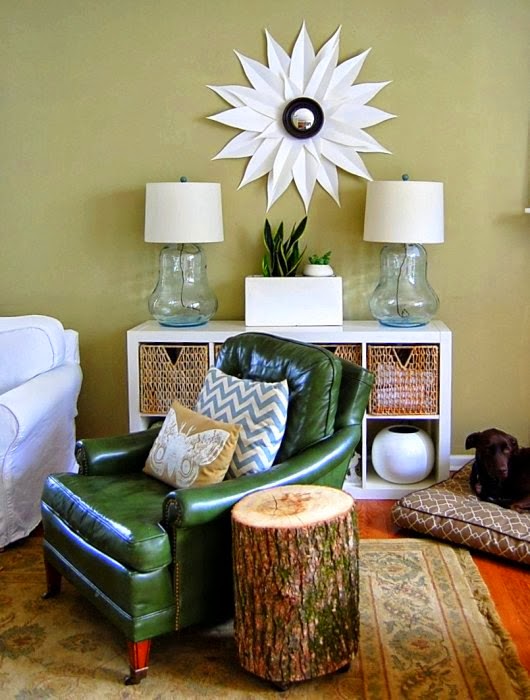
Check out this beautiful DIY Wall Decor 
Sunshine Mirror

Believe it or not...
        this fabulous looking Sunshine mirror will cost you no more then $5.00   
               because it is is simply made with one round mirror and some craft paper 

 What you think...
            You have some room left for just one more gorgeous DIY'er art project ??
 
     Here is how you do it ->

  1. 
Make yourself a template -
   so all your paper "sun rays" will look the same
One easy way to do this is to take about three folds of toilet paper
   and just cut the tips off as shown in the picture
2.
Next cut your decorative paper into several equal size strips
   and fold them in half...


Then cut your decorative paper strips according to your paper template
3.
Make sure that the round mirror you choose for this project is not too big

Since you always want to be sure that you like what your final project is going to look  like test it out first... just to be on the save side!
Just lay the mirror on a flat surface and place the "sun paper rays" around the mirror (see above)   

  4.
In order to be sure that your "Sunshine Mirror" actually looks like a sun
   and not like a flower 
   
You may want to add several different sizes of paper "sun rays" - 
   which will make it look even more interesting

5.
This is actually the most important step...
  Arm yourself with your Hot glue gun and glue on your "sun paper rays" 

Lay your mirror upside down on a flat surface
   and make yourself some marks as shown in the picture above...


Take your hot glue gun and start with the shortest set of "paper sun rays"
   then the next larger set of "rays"... and so on
      Be sure you glue your paper sun rays in a set of four (see picture) 
__________
When the sunshine mirror is finished...
   let it dry for just a little while and then you can hang on your wall
This surely is one pretty
"Sunshine Mirror"